Trusted Inspections for Welding Procedures in Harvey, LA, and More
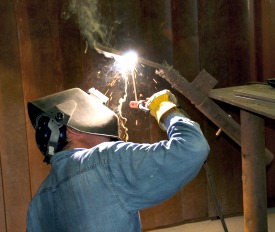 At SOUTHERN INSPECTION & TESTING, we provide a wide range of welder and welding services tailored specifically for the construction industry. Located in Harvey, LA, our facility is equipped to perform tensile testing, ensuring that materials meet stringent code specifications. Our expertise allows us to fully assess how materials will react under stress conditions, with a commitment to quality and safety in all welding procedures in Harvey, LA.
With a certified staff capable of drafting essential Welding Procedure Specifications (WPS), we also issue welder qualifications, as necessary. For more information about our welding services, feel free to call us at (504) 347-1752.
Bends
Bend Testing
Many welding codes necessitate bend tests as part of the evaluation required to qualify welders and their welding procedure specifications (WPSs). The fundamental concept of a bend test is straightforward: two plates are joined by welding and a flat strap made from these welded plates is bent into a U-shape. This process stretches the material on the outer surface of the “U” while compressing the inner surface, allowing us to ensure that the weld and base metal have been properly fused and that the weld metal and the heat affected zone (HAZ) have appropriate mechanical properties (Figure 1).
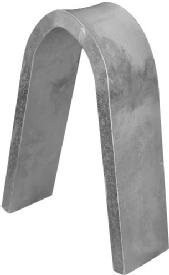 Figure 1: In a bend test, a flat strap of metal is bent into a U-shape, stretching the material on the outer surface of the “U,” while compressing the material on the inside surface.
Although bend tests may seem uncomplicated, there are numerous factors that can potentially lead to the failure of good welding procedure specifications or skilled welders. It is crucial that the individual responsible for interpreting test results possesses a deep understanding of these factors and knows how to adjust for any that may be causing erroneous failures.
Bend specimens have been called “a poor man’s tensile test.” Although it will not show the quantitative values associated with a tensile test, a bend test will demonstrate both the quality of the weld and its overall ductility. Usually, bend tests are designed so that the outer surface of the specimen is stretched to a ductility level that approximates the minimum percent elongation required in a tensile test. When defects exist in materials strained to these limits, the material tears locally. When tearing exceeds a specific limit, the specimen fails.
Charpy Impact
The Charpy impact test, or Charpy V-notch test, is a standardized high strain-rate assessment that determines the energy absorbed by a material during fracture. This absorbed energy serves as an indicator of a material’s notch toughness and helps analyze the temperature-dependent ductile-brittle transition. The Charpy test is widely utilized in the industry due to its straightforward preparation and quick outcomes at a low cost.
Tensile testing
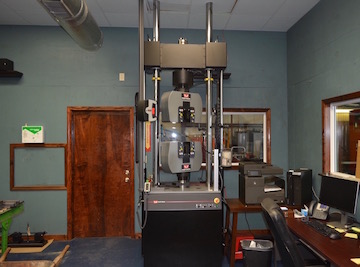 Tensile testing embodies a fundamental materials science examination where a sample is subjected to controlled tension until failure. The results, crucial for selecting the appropriate material for various applications, quality control, and predicting material behavior under different forces, directly measure ultimate tensile strength, maximum elongation, and area reduction.
Tensile Specimen
Tensile specimens made from an aluminum alloy. The left two specimens have a round cross-section and threaded shoulders. The right two are flat specimens designed to be used with serrated grips.
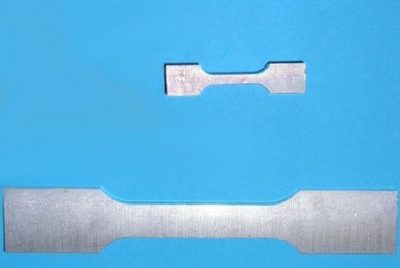
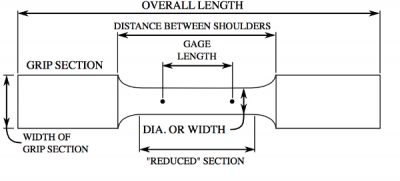
A tensile specimen is a standardized sample cross-section. It has two shoulders and a gauge (section) in between. The shoulders are large so they can be readily gripped, whereas the gauge section has a smaller cross-section so that deformation and failure can occur in this area.
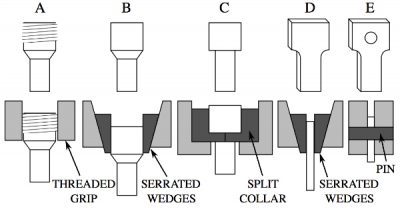
The shoulders of the test specimen can be manufactured in various ways to mate to various grips in the testing machine (see the image below).
Each system has advantages and disadvantages; for example, shoulders designed for serrated grips are easy and cheap to manufacture, but the alignment of the specimen is dependent on the skill of the technician. On the other hand, a pinned grip assures good alignment. Threaded shoulders and grips also assure good alignment, but the technician must know to thread each shoulder into the grip at least one diameter’s length. Otherwise, the threads can strip before the specimen fractures.
In large castings and forgings, it is common to add extra material, which is designed to be removed from the casting so that test specimens can be made from it. These specimens may not be exact representations of the whole workpiece because the grain structure may be different throughout. In smaller workpieces or when critical parts of the casting must be tested, a workpiece may be sacrificed to make the test specimens. For workpieces that are machined from bar stock, the test specimen can be made from the same piece as the bar stock.
Tube Sheet Mock Ups
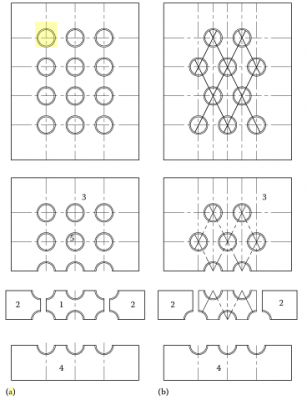
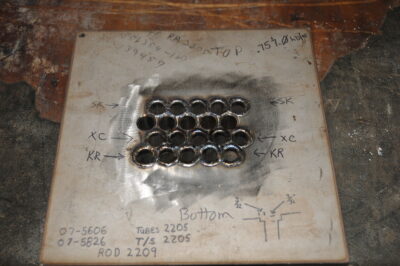 Before initiating the actual tube expansion work, we create a precise mock-up model using the same materials and design proposed for the full-size heat exchanger. This mock-up undergoes rigorous testing to evaluate the reliability of the tube-to-tube sheet joints. The test specimens consist of full-size tubes and a test block that accurately simulates the tubesheets.
During this process, essential parameters are established through mock-up trials. We qualify the joining process utilizing various testing methods, including dye penetrant tests, helium or pneumatic leak tests, pull-out tests, and microetching examinations of the welds. These tests are critical for verifying the minimum leak paths in the system.
The testing measures both the pullout (or pushout) strength and leak tightness of the tube-to-tubesheet connections, as well as the anchorage for grooved tubesheets. Pullout strength refers to the axial force necessary to separate the bond between the tube and the tubesheet. In shear load tests, the specimens are subjected to axial loads until either the tube or the tubesheet joint experiences failure.
Welding Procedures
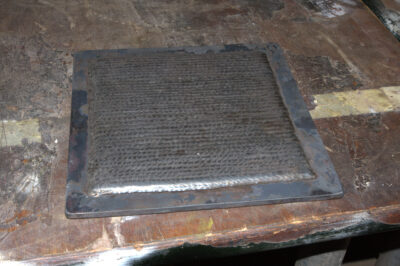 A Welding Procedure Specification (WPS) is a critical formal document that outlines the welding procedures necessary for ensuring high-quality production welds in compliance with code requirements. This essential guideline provides clear directions for welders and welding operators, enabling them to execute sound and reliable welding techniques consistently.
The purpose of a WPS is to ensure welders adhere to accepted practices, facilitating repeatable and trusted welding procedures across various projects. Each WPS is meticulously developed for specific material alloys and welding types, often driven by industry standards set forth by recognized codes and engineering societies.
A WPS is further supported by a Procedure Qualification Record (PQR), which serves as a comprehensive record of a test weld that has undergone rigorous testing to guarantee that the specified welding procedure will yield quality results. Individual welders must also be certified through qualification tests documented in a Welder Qualification Test Record (WQTR), demonstrating their understanding and capability to operate within the guidelines of the specified WPS.
The definitions for WPS and PQR can be found in various codes and standards:
- According to the American Welding Society (AWS), a WPS details the necessary welding variables for specific applications. This ensures repeatability by trained welders and includes a record of the welding variables used to produce an acceptable test weldment as defined by the AWS.
- The American Society of Mechanical Engineers (ASME) offers a similar definition, stating that a WPS provides direction for producing welds that comply with Code requirements. The ASME also defines a PQR as a record of the variables documented during the welding of the test coupon, along with the results of the tests conducted on the specimens.
For steel construction, particularly in civil engineering structures, the AWS D1.1 is a widely adopted standard that specifies both pre-qualification and qualification options for welding processes.
WPS is of two types- Prequalified WPS(pWPS) & qualified WPS.
Call us today to see how we can help with the Welding Procedures for your company.
Welders Testing
Welder Qualification and Welding Procedure Qualification
At SOUTHERN INSPECTION & TESTING, we provide comprehensive welder qualification tests to evaluate the ability of welders and welding operators to make sound, high-quality welds. Our services are essential for welder certification and are integral to the welding procedures in Harvey, LA. Organizations often require welders or welding operators to be qualified for each specific welding process used in production welding.
Importance of Weld Testing
Weld testing is a critical procedure that involves performing tests on welds to verify that the results align with the requirements specified in a welding procedure specification (WPS). These tests are essential for qualifying a welder to a stated procedure, serving as a crucial aspect of pre-employment screening or welder certification. This process ensures that welders possess the necessary skills to meet industry codes and company standards.
There are several recognized organizations with certified welding programs that contribute to the quality of welding procedures. Notable entities include the American Welding Society (AWS), which focuses on structural codes for buildings and bridges, and the American Society of Mechanical Engineers (ASME), which addresses boiler and pressure vessel codes.
Our Services as a Construction Testing Company
As a leading construction testing company in Harvey, LA, we offer independent, third-party weld testing and welder qualification services for certification and welding procedure qualification. Our comprehensive range of services includes:
- Welder Qualification Testing: We perform performance qualification and welder certification in accordance with standards from ASME, ANSI, AWS, API codes, DNV, Military standards, and Lloyd’s of London.
- Preparation of Welding Procedure Qualification: Customized to meet client or project-specific requirements.
- Documentation of Welding Procedure Qualification: Provided in a Certified Test Report that adheres to ASME, ANSI, AWS, and API codes, as well as DNV, Military standards, and Lloyd’s of London.
- Coupon Testing: Conducted per Welding Procedure Qualification, including visual examinations, mechanical testing, metallographic assessments, and nondestructive testing.
As a full-service weld test and welder qualification provider, SOUTHERN INSPECTION & TESTING boasts complete in-house resources to promptly and reliably fulfill your orders. Our lab is equipped with a full-service Machine Shop featuring band saws, CNC milling, turning, and grinding centers to effectively manage any size weld coupon.
For more information on how SOUTHERN INSPECTION & TESTING can assist you with your welder testing needs and to learn more about our welding procedures in Harvey, LA, please contact us today.
